Molding Your Snoring Mouthpiece Effectively
- Pink Van Hoek

- Aug 6, 2025
- 4 min read
Updated: Aug 28, 2025
Snoring can disrupt sleep and affect well-being. A snoring mouthpiece offers a simple, effective way to reduce snoring. But to get the best results, you need to mold it properly. I’ve learned that molding your snoring mouthpiece correctly makes all the difference. It ensures comfort and effectiveness. In this post, I’ll guide you through the process step-by-step. You’ll find practical tips and clear instructions to help you get a perfect fit.
Understanding the Importance of Molding a Snoring Mouthpiece
Molding a snoring mouthpiece is the key to stopping snoring comfortably. When the mouthpiece fits well, it gently holds your jaw in the right position. This keeps your airway open while you sleep. A poor fit can cause discomfort or fail to reduce snoring. That’s why taking time to mold it carefully is so important.
A well-molded mouthpiece:
Feels comfortable in your mouth
Stays in place all night
Helps you breathe easier
Reduces snoring effectively
If you rush the molding process, you might end up with a mouthpiece that doesn’t work well. It could cause soreness or even make snoring worse. So, patience and attention to detail pay off.

Step-by-Step Guide to Molding a Snoring Mouthpiece
Here’s a simple, clear way to mold your snoring mouthpiece. Follow these steps carefully for the best fit.
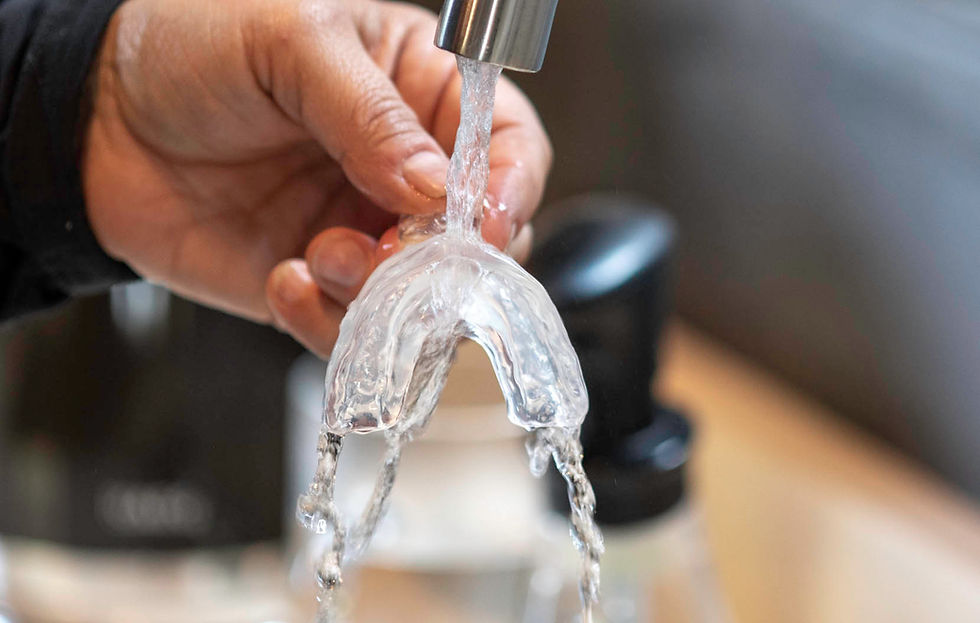
Boil water - Heat water until it reaches a rolling boil.
Soften the mouthpiece - Place the mouthpiece in the hot water for about 30 seconds. This softens the material.
Remove carefully - Use tongs or a spoon to take the mouthpiece out. Be careful not to burn yourself.
Cool slightly - Let it cool for 5-10 seconds so it’s warm but not too hot.
Fit to your teeth - Place the mouthpiece in your mouth. Bite down gently and press it against your teeth with your fingers.
Shape with your tongue and fingers - Use your tongue to press the inside and your fingers to mold the outside.
Hold position - Keep the mouthpiece in place for about 30 seconds.
Cool in cold water - Remove the mouthpiece and place it in cold water to set the shape.
Repeat the process if the fit isn’t perfect. It’s normal to need a couple of tries to get it just right.

How to mold a mouthguard without boiling?
Sometimes, boiling water isn’t an option or you want a gentler method. You can mold your mouthpiece without boiling by using warm water instead. Here’s how:
Fill a bowl with warm water (not hot, about 120°F or 49°C).
Soak the mouthpiece for 1-2 minutes to soften it.
Follow the same fitting steps as with boiling water.
Be patient, as the material may take longer to soften.
This method is safer for those who are sensitive to heat or want to avoid burns. However, it might take a few more attempts to get a perfect fit. Always test the temperature before placing the mouthpiece in your mouth.
Tips for a Comfortable and Effective Fit
Getting the right fit is about more than just molding. Here are some tips to help you:
Follow the instructions carefully - Each mouthpiece may have specific steps.
Don’t rush - Take your time molding the mouthpiece.
Check for comfort - It should feel snug but not painful.
Avoid sharp edges - If you feel any rough spots, smooth them gently.
Test wear - Try wearing it for short periods before sleeping all night.
Clean regularly - Keep your mouthpiece clean to avoid irritation.
If you want detailed guidance, you can learn more about how to mold mouthpiece on the official SnoreMate site. This resource offers clear, step-by-step instructions tailored to their products.
What to Do If Your Mouthpiece Doesn’t Fit Right
Sometimes, even after careful molding, the mouthpiece might not fit perfectly. Don’t worry - this is common. Here’s what you can do:
Re-mold it - Repeat the molding process. Sometimes a second or third try is needed.
Adjust bite pressure - Bite down gently but firmly when molding.
Contact support - Reach out to the manufacturer for advice or replacement options.
Try a different size - Some mouthpieces come in multiple sizes.
Remember, a good fit is essential for comfort and snoring relief. Don’t settle for a poor fit. Keep adjusting until it feels right.
Enjoying Better Sleep with Your Molded Mouthpiece
Once your mouthpiece fits well, you’ll notice the difference. Snoring should reduce significantly. You’ll breathe easier and sleep more soundly. Your partner will appreciate the quieter nights too.
Using a molded snoring mouthpiece is a simple step toward better health. It’s affordable and easy to use. Plus, it helps you wake up refreshed and ready for the day.
Keep your mouthpiece clean and store it safely. Replace it as recommended to maintain effectiveness. With the right care, your mouthpiece will serve you well for a long time.
Molding your snoring mouthpiece effectively is the first step to peaceful nights. Take your time, follow the steps, and enjoy the benefits of better sleep. You deserve restful nights and refreshed mornings. Start molding your mouthpiece today and breathe easier tomorrow.